I am not doing craft shows anymore, for a variety of reasons, but I still have inventory to sell, so I am having a craft show right here on my blog! My prices all include shipping (
free shipping on everything to the continental US!), and are lower than my craft show prices, so get 'em while they last! Take an additional $1 off each item after the first (example: buy 5 items, and get an additional $4 off)! Please excuse any wrinkles or wonkiness... these items have been in storage totes since my last craft show, but will come back to life with use! :)
If you wish to purchase something(s), please email me (
resweatercontacts [at] gmail [dot] com ) with the item #(s), brief description, and an email address to send the Paypal invoice to. Please understand that I cannot hold these items. If you want them, please pay right away. Thanks!
recycled wool and cashmere ornaments, handmade by me. $5 for the first one, ($4 per additional, when you take off the $1 per item). Please specify whether you'd like Christmas colors, girly colors, earthy colors, colorful, or "surprise me"...
Item #1
 recycled wool dryer balls
. These are handmade by me from recycled wool.
These naturally help your laundry dry faster, reduce static, and soften
your laundry. These eliminate the need for chemical laden dryer sheets
and laundry softener. These pay for themselves in the energy they save,
and the products they replace, plus they make a unique gift for those
hard to shop for people on your list! I will do my best to fill color
requests, but I am limited to what I have on hand. $10 each or $18/pair
(pair counts as 1 item for $1 off discount). Using these in pairs is recommended.
Item # 2
Throw pillows (approximately 11"-13" square). All covers (removeable) handmade by me, made from recycled wool or recycled cashmere. The pillow inserts inside are new, prices below pictures....
#3 lavender cashmere with travel trailer (like Scamp) wool applique, $25
#4 gray wool with sheep applique, $18 [sold]
#5 brown wool with sock monkey applique, $18 [sold]
#6 purple owl with feet, $18 [sold] This one is sold, but I do have a similar owl pillow in taupe/browns. You can see a picture of it
here.
#7 aqua cashmere with travel trailer applique, $25 [sold]
#8 red winged black bird [was a bad camera angle- is not crooked], $15

#9 green and plum lambswool fair isle, $10
#10 neutrals patterned merino wool, $10 [sold]
#
11 green with stripes lambswool, $10 [sold]
#12 blue/gray plaid merino wool, $10
#13 red/green patterned wool, $10 [sold]
#14 green paisley wool, $10 [sold]

#15 red fair isle lambswool
#16 red/green patterned wool, $10
Recycled wool and cashmere "funky hats". These are stretchy, so they fit
a variety of head sizes. Some of the headbands are looser and best for
adults only, but I think you can tell in the pictures which ones are. If
in doubt, just email me and ask. Wool are $10, cashmere are $13...

#17 blue/pink fair isle/green, #18 cream/green fair isle/green, #19 purple/coral/pink
#20 gold/multi/moss [sold], #21 navy/orange/navy [Bears colors!],
#22 tan/fair isle/magenta [sold]

[these are all wool, $10]
#23 black/blue snowflakes/gray [sold], #24 tan/orange stripe/green, #25 green/purple/orange stripe
#26 pink/striped/pink,
#27 lavender/striped/purple [sold], #28 blue/red & pink/purple

[these are all wool, $10]
#29 purple/striped/coral striped, #30 brown/multi/gold, #31navy/orange/navy [Bear's colors!]
#32 cream/fair isle/tan, #33 tan/fair isle/magenta, #34 lavender/stripes/tan

[these are all wool, $10]
#35 tan/brown stripe/brown, #36 cream/green fair isle/gray, #37 maroon/patterned/maroon
#38 maroon/patterned/navy, #39 blue/striped/gray, #40 rust/brown fair isle/brown

[these are all cashmere, $13]
#41 brown/pink argyle/pink, #42 light orange/orange/tan,
#43 magenta/pink/raspberry [sold]
#44 raspberry/stripe/dk. pink, #45 plum/pink/pink argyle, #46 tan/coral/brown
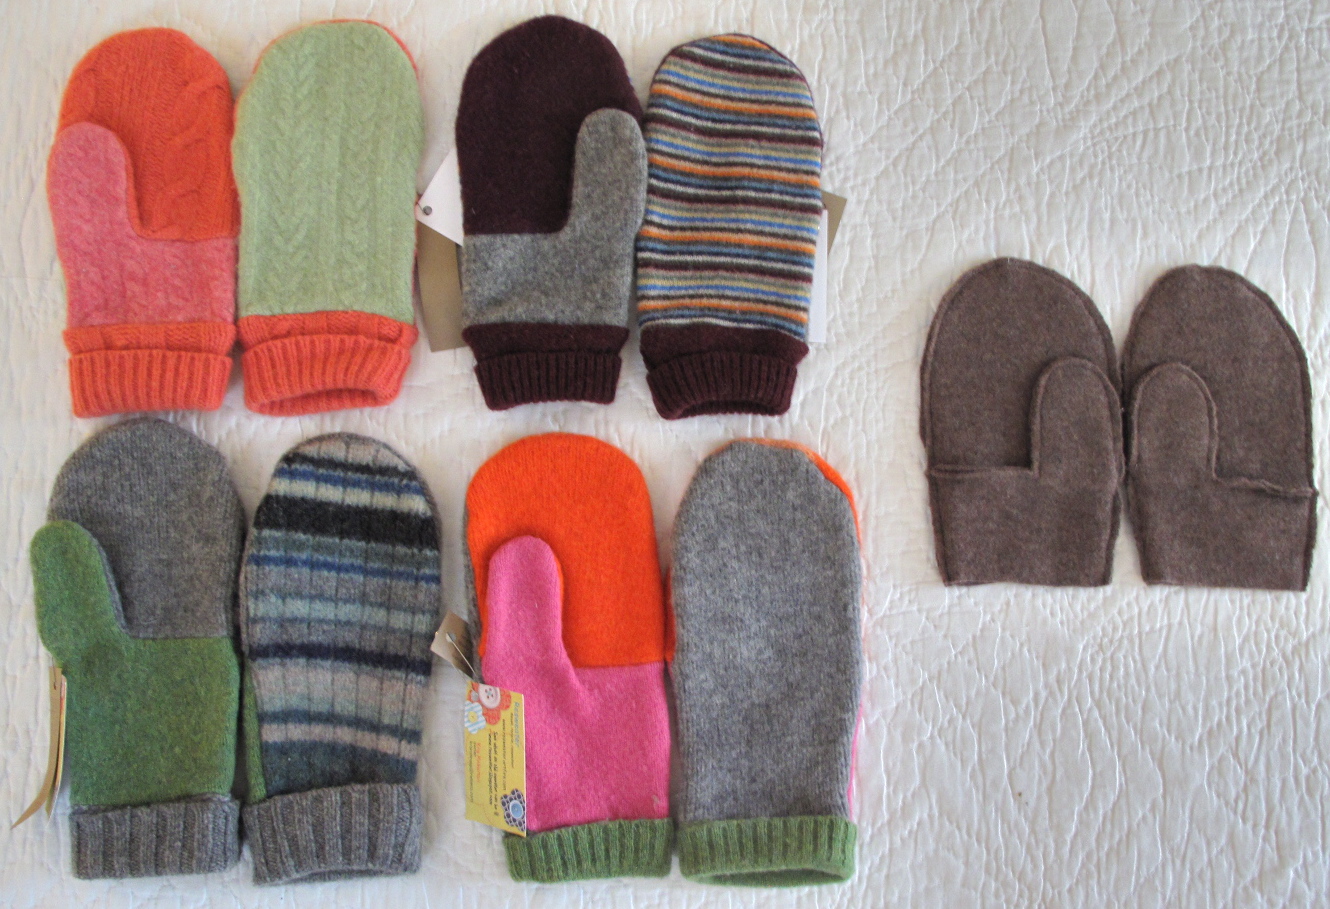
Recycled wool and cashmere mittens. These are one size, and tend to run big, so not great for tiny hands, but great for average to large sized hands. Each pair comes with a pair of "mitten doublers", which are removable inside liners (wool for the wool mittens, and cashmere for the cashmere mittens), or take off $3 if you do not want the doublers. $15/pair for wool or $18/pair for cashmere ($12 and $15 without the doublers). I only have 2 pairs of cashmere doublers, so when those are sold out you can either use wool doublers in the cashmere mittens or buy them without the doublers.

[wools: shorter style on top row, longer style on bottom row]
#47 coral/tan/green,
#48 multi/pink/blue [sold], #49 blue fair isle/green/blue
#50 maroon orange stripe/blue/orange, #51 navy pink stripe/navy/pink, #52 pink fair isle/lt green/green
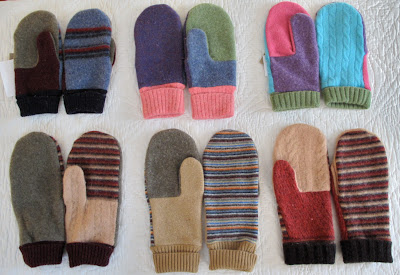
[wools: shorter style on top row, longer style on bottom row]
#53 blue stripe/navy/maroon, #54 purple/pink/blue, #55 aqua/green/purple
#56 green/maroon/tan, #57 multi stripe/tan/tan, #58 stripe/brown/burgundy

[wools: shorter style on top row, longer style on bottom row. Example of mitten doublers on right]
#59 green/coral/pink, #60 multi stripe/plum/gray
#61 blue stripe/gray/green [sold], #62 gray/green/pink

[cashmere: shorter style on top row & bottom left, longer style on bottom row right]
#63 maroon/magenta/maroon, #64 green/moss/coral, #65 moss/yellow/moss,
#66 yellow/moss/yellow, #67 blue/blue/gray, #68 maroon/plum/gray,
#69 yellow/tan/tan
Recycled merino wool runner's mittens. These thin, soft, breathable, moisture wicking mittens are perfect for runners. These versatile mittens are also great for errand running, and can also be used as an inside lining for other mittens. $10/pair

#70 tan, #71 tan, #72 gray, #73 black, #74 charcoal
Recycled wool draft stoppers (place on threshhold to keep drafts from coming in), filled with recycled wool scraps for natural insulation, all 40-45" long. $12.
[***pictures of draft stoppers to come soon***]
#75 scrappy gray/burgundy/fair isle, #76 brown/ends look like cut logs, #77 scrappy brown/gray/patterned, #78 scrappy rust/brown/striped
#79 scrappy with gray bug face, #80 scrappy with blue bug face
Please don't hesitate to email me with any questions... (
resweatercontacts [at] gmail [dot] com ) !