Thursday, June 14, 2012
Summer hiatus!
As some of you know, summer's are very busy for me at home, running around having fun with my son, taking day trips, bike rides, and gardening. Last year I took a summer hiatus or 2 from Resweater, and it was just what I needed to recoup. I will be taking my first hiatus starting tomorrow, June 15th, and will "return" Monday, June 25th, in time to post Sweater Monday. During this time, you are free to email me if you have any questions, but I will not be doing any blog posts, trips to the post office, listing in my shop, or any other time consuming business tasks. I appreciate your understanding!
Tuesday, June 5, 2012
It's Tutorial Tuesday! Make a recycled wool bike seat cover!

I went for a bike ride the other day, and though the rest of me felt great, my bum was too warm! I of course thought of breathable, moisture wicking wool, and got to work!

First, take a piece of paper & make a template for the seat top, making sure to add on about 1/4" all around for seam allowance.

Now, using that template, cut out a piece of felted wool. You will also need a strip of wool long enough to go all the way around your seat piece. You probably won't have a long enough piece to do that, so just sew 2 pieces together, like I did, then join the ends, so it makes a complete circle. You will want this to be about 1" deeper than the bike seat's side.

Now you will want to sew the circular piece to the seat piece, wrong sides out.

It should look something like this when you are done doing that...

Now you will need some elastic. Please note: I like to use what I have on hand, so I used a thick piece of elastic, but a thinner piece of elastic would have worked much better than what I used. Stretch the elastic while you zig zag stitch it to the [not stretched] wool edge. You will be sewing it to the outside edge (the "wrong" side of the wool).

When you are done going all the way around, you can flip it right side out, and it should look like this...

Now it's time to put you cover on your bike seat! If you used the right elastic & stretched it enough while sewing, you should be done. If your cover ended up not tight enough, like below (because I used too thick elastic), there is an easy solution.

Take the cover back off, flip it inside out and sew closed the skinny part, like this...

When you flip it right side out again, it should resemble a goofy looking slipper.

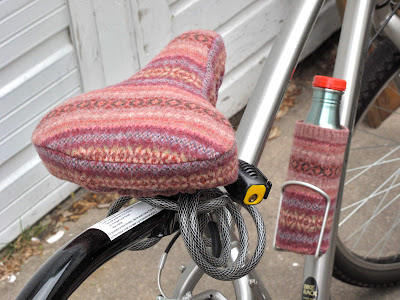
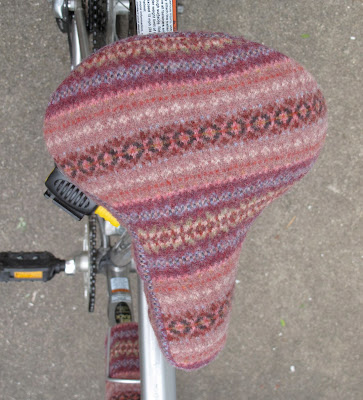
Now when you slip it back on the bike seat, it should look perfect!

I tested it out with a long bike ride, and it works great! No more plastic seat sweat (yuck!)! It also looks cute with my water bottle cozie :).
Labels:
bike seat cover,
diy,
recycled wool,
tutorial,
Tutorial Tuesday
Subscribe to:
Comments (Atom)
