Tuesday, March 23, 2010

Tutorial Tuesday - recycled wool Easter basket!


I am glad I decided to take the time to make Jack his basket this year. It turned out nice, and we will enjoy it year after year. He really likes it and is hoping the Easter bunny will bring him Panda Puffs (his favorite cereal) and dried strawberries. He's making it too easy for the Easter Bunny ;)

Ok, on with the tutorial! First felt the sweater you will be using, then cut straight across at the armpits, unless you want a shallower basket. You can cut it lower to make it shallower. The size of the basket depends on the size of sweater.


Now you have a sweater tube. If you are planning to embellish this is the best time. I made egg appliques out of colorful scraps and sewed them all around. Now take the narrower end (on mine it was the waist) and fold it inside, so the 2 edges are together and the fold will be the edge of your basket.


Determine whether or not you want a round or oval bottom (you may not have enough enough sweater to make a round bottom, depending on the sweater), hold the folded tube in the position you want and trace it on a piece of paper or cardboard. That will be your pattern, and you can cut a piece to make the bottom of the basket with it. I recommend cutting 2 pieces to double it, if you are not using a thick felted sweater, like I did.


You can now sew your folded tube to your bottom with your "right" sides (the sides you have embellished and/or want on the outside of the basket) in. I was thinking I would have to sew it by hand because of the thickness, but the 3 layers just fit on my sewing machine.


Now cut 2 strips the length, but twice the width (+ seam allowance), you want the handles to be. fold them over right side in & sew them shut. You can pin them if you want, but I just did it to show where you will be sewing.


Now turn your sewn tubes inside out, so the seam & "wrong" sides are on the inside. You can leave them tube-like, or sew down each side to make them flatter, like I did, depending on how you want your handles to look.


Now just sew them on where ever you want the handles to be. There was no way my sewing machine could handle all of those layers, so I sewed the handles on by hand, stitching the usual square with an X in the middle (is there a term for that?). I'm probably going to redo them, since I did a sloppy job of getting them on, but they are still on good, even if I don't. Now it's ready for Easter goodies!

Monday, March 22, 2010

Not cool

Someone that reads my blog has copied my shop. The shop I have worked so hard to build. The shop that inspired this blog that I have freely given advice, tutorials, and ideas on. It is not the fact that they are selling wool sweaters, but the fact that they blatantly copied everything about my shop... my prices, the wording of things, the way I number my sweaters, the way I take pictures of them, etc. I have worked so hard to build what I have, and they have come along and copied everything I have done without any creativity. It is amazing that one mother could do that to another mother and still sleep at night.

Saturday, March 20, 2010

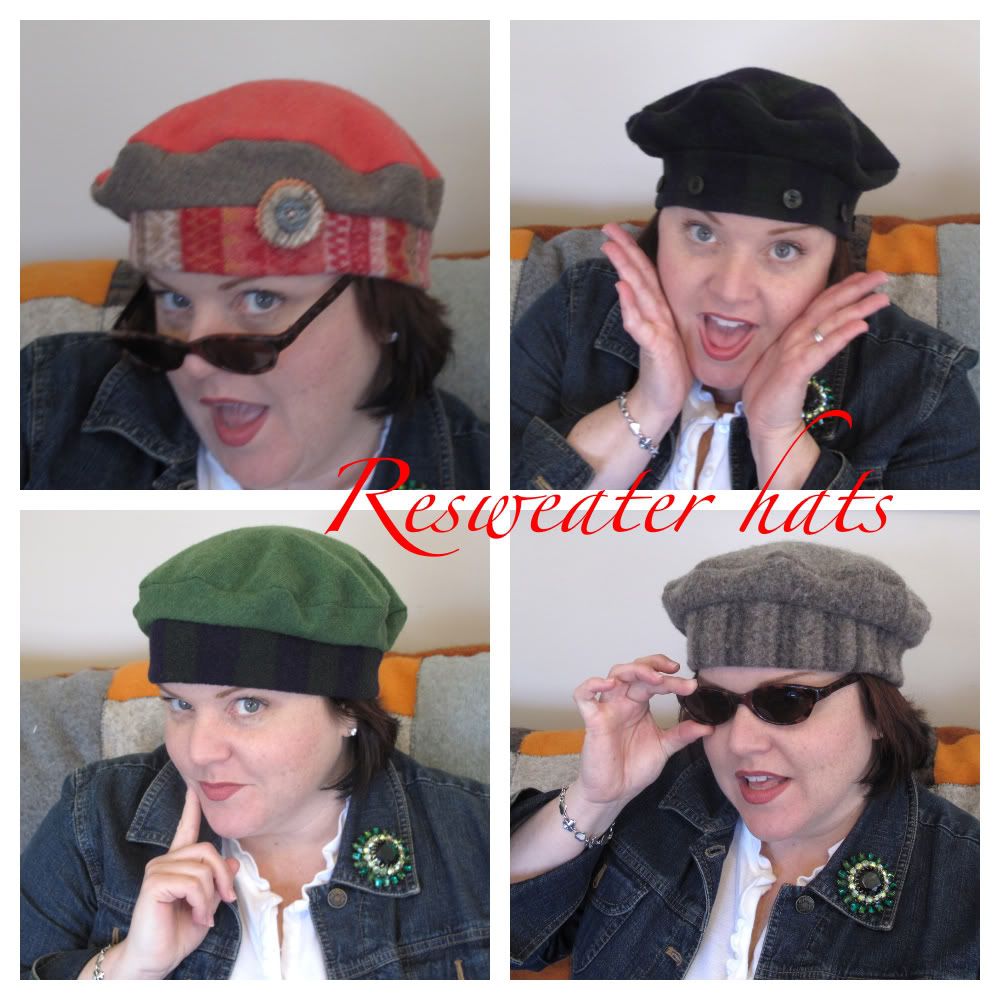
Resweater hats and new blog schedule


I have been making hats to sell at the fiber fairs this summer, but realized that when you look at them on the rack, you have no idea how they will look on a head, so I asked my friend to model them for me, so I can have a little poster on my rack. Isn't she beautiful & fun?

I apologize that i've been slow to blog lately. Since summer is coming, and things will get busy around here, I decided to put my blog on a schedule. I do well with schedules. This also gives me a couple of days off from blogging to refresh, sew in between, and research new things. The new schedule is:

Sunday - Sweater Sunday: show the sweaters I got during the week
Tuesday - Tutorial Tuesday: a recycled wool tutorial
Thursday - Off Topic Thursay: discuss something that is not recycled wool
Friday - Feature Friday: feature a shop that sells recycled wool products

What do you think?

Wednesday, March 17, 2010

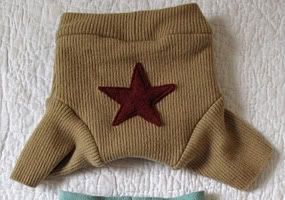
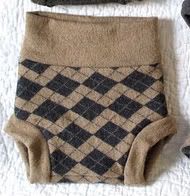
My diaper covers in action!


Looking at my diaper covers laying flat doesn't do them justice, so a friend of mine let me use her baby as a model! Since he was on the go, we were only able to try on a couple of pair. Many blurry deleted pictures later, we have pictures!


Even though this this one was too big for him, it still looks much more adorable on a bottom than just laying there!


I will have a wide variety of soakers and shorties like these at the fiber shows this summer, so if you're in the area when the shows are on, stop on by!

Tuesday, March 16, 2010

Tutorial Tuesday - Super easy sachets!


These are ridiculously simple, but make a great gift, and use up scraps! This is a great project for beginning sewers, and a fast project, even for those that hand sew. You can customize these any way you want with shape, embellishment, or scent.

First, cut 2 pieces of your shape. I like to use pinking shears for a nicer looking edge, but it is not crucial if you do not have any. Since a friend asked what they were, they are the scissors that cut a zig-zag edge.


Next, start sewing them together, stopping when you are on the last edge. Drop 2 drops of essential oils (I used lavender. Mmm... lavender) on a few pieces of scraps and stuff them in, then finish your sewing. You're done. Wasn't that easy?

Monday, March 15, 2010

It's a bird! It's a plane! ....


... It's Super Jack!!

If you have a 4 year old boy, or ever been around one, you know that they are all about adventure and super heroes! Though my son had never seen an episode of anything with a super hero, he learned it through osmosis. You moms of 2 year old boys that love Elmo and Barney, that are shaking your heads, saying "not my sweet boy"? Yes, it will happen to you too. Those sweet Elmo loving darlings will one day be turning anything stick shaped into a "light saber", and leaping off your couches yelling super hero phrases. I have accepted it, and even think it's really cute now that i've adjusted, so this morning I made Jack a cape. It was incredibly simple... just a rectangle of fabric, and recycled wool (of course!) appliques. The sloppy looking button and loop of elastic is temporary, because I don't have velcro in the house at the moment, but my little super hero doesn't mind :)


Saturday, March 13, 2010

Recycled Wool & cashmere Tooth Fairy pillow!


My friend's daughter has a loose tooth, so the tooth fairy will be visiting soon! My friend looked on Etsy, and didn't find what she was looking for, so she asked me to make one for her from a cashmere sweater she actually found for me a while back. I originally wanted the tooth to be the pocket, but I couldn't figure out a way to make to make the opening look good, and I was also worried about her tooth falling into the "roots" of the tooth pocket, and not being able to get it out, so I just made the tooth an applique and put a pocket on the back. I wasn't thrilled at how it turned out, but hopefully it will be ok for them. I think i'll try this again, but maybe a square or rectangle this time. What do you think? Any pointers?


On a completely unrelated note, another friend was wearing an awesome bracelet a week or 2 ago, and I hinted to her that my birthday was coming up in May, but she made one for me and gave it to me yesterday! Isn't it fabulous? She made it from fabric scraps & rope. She said she might try it with recycled wool... I can't wait to see it!