Showing posts with label Felted Wool. Show all posts

Tuesday, April 24, 2012

It's Tutorial Tuesday! Make a recycled wool mustache!


Here's a fun and quick little project! You will need some black felted wool (I used merino), and something to hold the mustache up with. I found this egg dipper, from an Easter egg decorating kit, floating at the bottom of my junk drawer. It worked out perfectly, once I bent the end to the shape of the mustache, but you can use a chop stick, pencil, etc. as well.


Now, find a template for a mustache you like. I used this template, but if you search Google images for "mustache template", you will have hundreds to choose from.


Now cut out 2 mustache pieces, using your template.


Sew the 2 pieces together with a simple straight stitch, leaving a 1/2 inch opening on the bottom side.


Now just slide the egg holder (or pencil, chop stick, etc.) in, and you are done. I chose to add a little glue to the end I was sliding in, to reinforce it a little, but it wasn't necessary.


Now you're done! Go have fun!


Friday, February 24, 2012

It's Feature Friday! Refashion co-op


Yep, more knee patches! This is the first pair of jeans, that I bought new, that my son has put knee holes in. All the previous holey knees were from thrifted jeans, whose knees were already faded and on borrowed time. Hopefully this is not an indication of how things are going to be from now on... I can only patch them so fast ;) ! I asked my son what he wanted for this pair, and he said "stars... like on GI Joe stuff". Army green stars it is!

Here's the jeans, before and after....


and a close up of one of the knees, before and after...


It'll look cooler after they get washed a couple more times, and the stars get fringier.

What does this have to do with Feature Friday? Well, I occasionally blog for a coop blog, Refashion Co-op, and I blogged about this pair of jeans there. It is a great blog, devoted to upcycling clothes, with many different contributors. There are so many great ideas on there, and I highly recommend checking it out!

Thursday, February 2, 2012

What I've Been Working on Wednesday ... part 2 on Thursday


Totally forgot to post about my skirt yesterday! There was a felted merino cardigan in with the new sweaters a couple of weeks ago, and it kept telling me it wanted to be a skirt! I just cut across under the arms, sewed the cardigan opening closed, narrowed it a bit at the top, and made a waist band (making the back wider, than than the front, so it doesn't ride up on my rear) from the arms. Now I have a cute cozy bum warming skirt! This skirt with leggings is warmer than jeans, and cute with boots to boot! Since taking the above picture (my 6 year old was my photographer :) ), I have seam ripped the bottom 4 inches of the stitching I put in to keep the cardigan closed. It lays & moves better now, and still stays closed. I love the rolled original hem, and little belts... it made for some great detail in the skirt.

Tuesday, December 13, 2011

It's Tutorial Tuesday! Make a cute coupon or tea bag wallet


Dena, over at Everything But The Oink, has come up with another great tutorial... a tea bag or coupon wallet! What a fun gift idea, and with her simple & easy to follow tutorial, you can make these in time for Christmas! For the full tutorial, just click here, to be magically transported to her blog!

Tuesday, November 29, 2011

It's Tutorial Tuesday! Make a recycled wool stocking from scraps!


I have a confession. My family has been using store bought stockings until this year. Two from garage sales, and my son's stocking is from the dollar store. Isn't that horrible? This year I have decided to finally make ours, and here's a tutorial to boot!

First you will need a stocking to trace, to make a pattern, or just wing it... trust me... I have no artistic ability, and I can do it! You can also use Martha Stewart's stocking template, if you need a pattern. Now trace/draw & cut out 2 patterns.
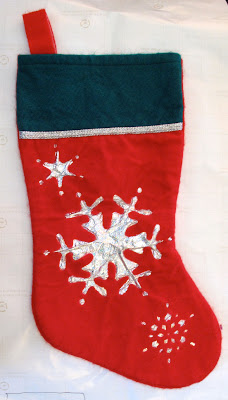


Take the front pattern, and cut it into the pieces you would like.


Now use your pattern pieces to cut your felted wool pieces, remembering to leave a seam allowance (1/4"or 1/2" doesn't matter... whichever you prefer) at all the edges. Now sew your pieces together, remembering to keep right sides together.


Now take your uncut pattern, and cut out your piece for the back. You could also repeat the process of the pieced side, if you prefer the whole thing to be pieced.


Sew those 2 pieces together, right sides in, and don't sew the opening closed at the top!


Now for the top cuff, you can use a turtleneck, if you have one that's big enough & coordinates, or you can make the top from 2 rectangles sewn on each end. You will want the rectangles to be a little wider than the width of the top of the stocking, by about an inch.


Now to make a hanging loop for the stocking. Just take a strip of wool (mine was approximately 6" long, and 2 1/2" wide), and fold back a 1/2" on each side & sew it down. fold it over with the sewn edges touching. Now you have a loop.


Now, with your stocking still wrong sides out, place your cuff inside the stocking opening, so you can see the right side of the cuff when you look inside. Place the hanging loop upside down (cut edges up) at the back, by the side seam. Now sew these together, stretching lightly, and evenly, as you go. Since the cuff will be slightly bigger than the opening, you may need to stretch the stocking opening ends a little more than the cuff to even them out.


You don't have to, but to get a smoother stocking, you can now turn your stocking right sides out, pull the cuff up, and sew down that seam, so it's not so bulky. I used a zig-zag stitch, but a regular stitch will do the job too.


Now, if you haven't already, flip your stocking right side out & fold the cuff down. "Hey... that doesn't look right!" you are saying about now. Iron it! It is amazing what an iron can do ;). Now I have 3 great stockings for our family! Jack's is a little wonky looking, but that was because he wanted his bigger, and I tried to wing it without making a new pattern (I rushed through the ironing too). Silly me! I am not worried about it though... it will look perfect when it is stuffed with goodies! :)

Tuesday, November 1, 2011

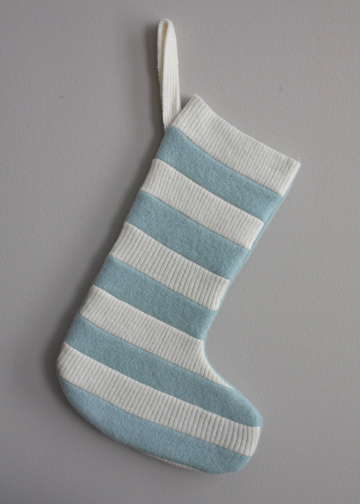
It's Tutorial Tuesday! make a striped Christmas stocking!


As you all know, it is never too early to start Christmas projects! I found this tutorial on The Long Thread blog. What I like about this one, is that you don't need a striped sweater... this was pieced together from 2 solid sweaters! To be whisked away to The Long Thread's full tutorial, click here!

Tuesday, September 20, 2011

It's Tutorial Tuesday! Make a recycled wool leaf scarf!


Now that fall is here, I can't think of a better tutorial to post than this one! This great tutorial comes from Kathleen's great blog, Refashionology. To be magically transported to Kathleen's tutorial, click here!

Wednesday, May 18, 2011

It's What I've Been Working on Wednesday!


We just celebrated a birthday for my sister in law that I love, and I made her this pillow. She loves Noah's Ark, so Noah's Ark it was! Here it is flat, so you can see it better.


Don't ever expect me to duplicate this one, lol! It took a lot of work, but luckily my husband helped me on this one by making some of the patterns for me (the ark, the giraffe), and brainstorming with me on the rest.


I was pretty happy with how it turned out! The birds & elephants got wonky on me, because they moved while I was sewing them on, but that was the worst of it. I didn't have a big enough blue piece to go across the bottom, so I thought it would be ok if it had a seam. I was wrong. It looked terrible. The whale is covering the seam :).


I have also been making dryer balls over the last few weeks. I like to work on them while I watch tv in bed at night (yes, I watch tv & sew in bed) They were in various stages, so I completed them. If you are interested in purchasing any, I sell them here.


I finished a diaper cover that I had cut the pieces for months ago, but just never got around to sewing.


I made one patterned pillow. I just love this pattern!


I think that's it for this week! What have you been working on? As always, feel free to post your finished recycled wool projects on my Facebook page!

Tuesday, May 10, 2011

It's Tutorial Tuesday - Super easy hair clips & pins!


I make lots of these, because they are quick, easy, & look great on hats, etc. This is a great project for beginning sewers & children!


This is a great way to use up your felted scraps too! Ready for the tutorial? You will need felted wool (the more felted, the better), buttons, needle & thread, and some pinking shears. If you are making a pin or hair clip, you will need those as well.

Take your pinking shears & cut 2 circles, one slightly bigger than the other, in contrasting colors.


Place the smaller circle on top of the bigger one, then the button on top of that.


sew them together, just like you sew a button on a shirt.


Now just sew it onto what ever you want (directly on a hat, on a hair clip, on a pin, etc.). I made a hair clip this time. You can buy packages of these clips at craft stores, with the holes in them for sewing.


Wasn't that easy? :)