

I know I did an Easter basket tutorial last year, but I wanted a bigger Easter basket for Jack this year. He tends to get bigger things from the Easter bunny, instead of a lot of candy, like his favorite cereal that is never on sale, or that light saber he's been wanting ;), so he needs more room! Since I was making a new one, I thought i'd try something new, so here you go! You can make this any size you want. Last year's basket was easier than this one, because it had a lot less steps, but this one is still not hard. The hardest part is trying to figure out my explanations ;)
First step is to cut out your bottom piece or pieces. The size, and whether you want an oval or circle bottom, is totally up to you. If you are working with a heavily felted, stiff wool, you will want to cut one piece. Mine was still floppy, so I used 2 pieces for extra stability. I wish I would have used a stiffer wool. It would have involved less steps, and it would have given the basket more stability, and helped it to retain it's shape.

Next, cut 2 strips that together equal the distance around the basket + 1/2" (for seam allowances), and 2 strips of the sweater's ribbing, the same length & thickness (mine were about 2" thick, though it doesn't matter as long as they are all the same thickness).


Set aside the ribbing pieces for now. Take the 2 non ribbed strips, place them together right sides in, and sew the 2 ends. Now you can sew the strips (which now form a circle) to your bottom. I sewed mine so the bottom seam was on the inside, for a cleaner look, but you can make it so the seam is on the outside if you want more stability & it to keep a better shape.


Now you will want to cut strips for the vertical slats of the basket. You can cut them to any length, but the length of the strips will determine the height of the basket. My strips were approximately 6" tall, resulting in a basket height of approximately 9" (6" strips + 2" rim + 2" bottom piece - 1/2" on each end for overlapping to sew). My strips were 2" wide, and I pinned them to the inside of the bottom rim with about 1" in between each one. The number of strips you will need all depends on the size of your basket, the width of the strips, and the space you leave in between each strip (you don't even have to leave a space between the strips). I highly recommend pinning them all in place before sewing, so you know your spacing is ok.


Now sew all the way around, so all of the strips are attached.

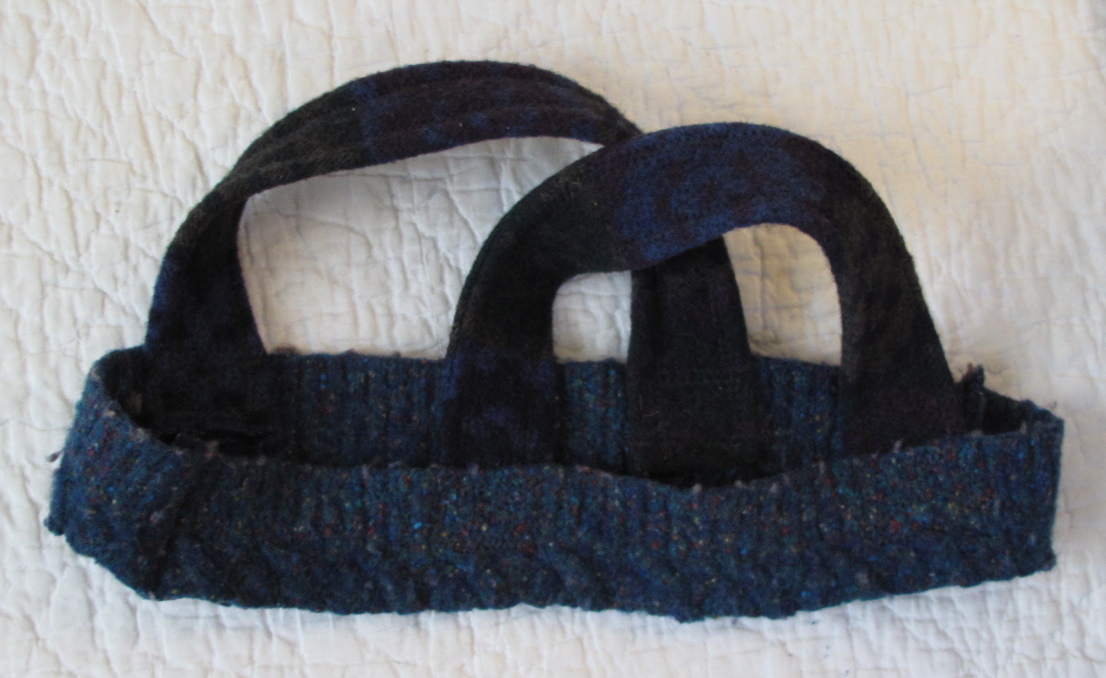
Now make some handles. If you are using a thick wool you might only need to cut them to the size you want. Since I had a floppier wool, I used the technique from last year's Easter basket tutorial here. Now take your ribbing pieces that you set aside and sew your handles in the center of each. After you do that, sew the ends togther, and turn right ride out. This is the top of your basket.

Now you can sew the ends of the strips to the top rim, just like you did with them on the bottom. I have no idea why I don't have a picture of this step, but I don't :( . Hopefully you can envision it. Now it's time to make your horizontal slats. If you have a softer felted wool like mine, you will need to make them double thick, so you will need 4 strips for each slat... 2 to equal the girth of the basket, and 2 for the second layer. Mine had 3 double thickness slats, so I needed 12 pieces.

To make each of the 3 slats, I laid each pair horizontal, overlapping 1/2" and sewing where they overlapped. I then sewed 2 of those together, right sides out, to make one long double thick slat.

Now weave the horizontal slats in & out of the vertical slats, overlap the ends a little & pin them together. Once you have all your slats in, you can sew them where they are pinned, and slide your sewn ends behind a vertical slat.

If you wanted a plain basket, you are done! I thought I was, but my son informed me that Easter baskets need to have eggs on them, so I cut some eggs out of colorful scraps I had and hand sewed them on.

I had some felted green in my stash, so I cut some into strips for Easter grass too.

Now I have a cute woven basket...

... to leave out for the Easter Bunny.


10 comments:
I can't wait to give this a try after I am done with my theater props!
I totally love this! It's fabulous and would be a great storage basket for lots of stuff. I've really been into weaving lately (not literally just combining wool and cotton and weaving it) anyway...this project will be perfect for me to try. Thanks!
You ingenuity continues to amaze me! Such a fabulous idea. Definitely going to try it using scraps of different colors. Always looking for great ideas to use scraps. They pile up so quickly!
Recycled wool easter grass... you are so clever!
I love that the basket is woven! Very clever, and the eggs just add the right touch. :)
kraft chica - way to go! Love love love it!
Thanks! :)
I made baskets based on your tut from last year. I postes them on my blogs and added links to yours. I hope you like them!
www.thinkoutsidethesweater.blogspot.com
www.updoshoppe.blogspot.com
Thanks for linking to me! Your baskets are adorable!
Post a Comment